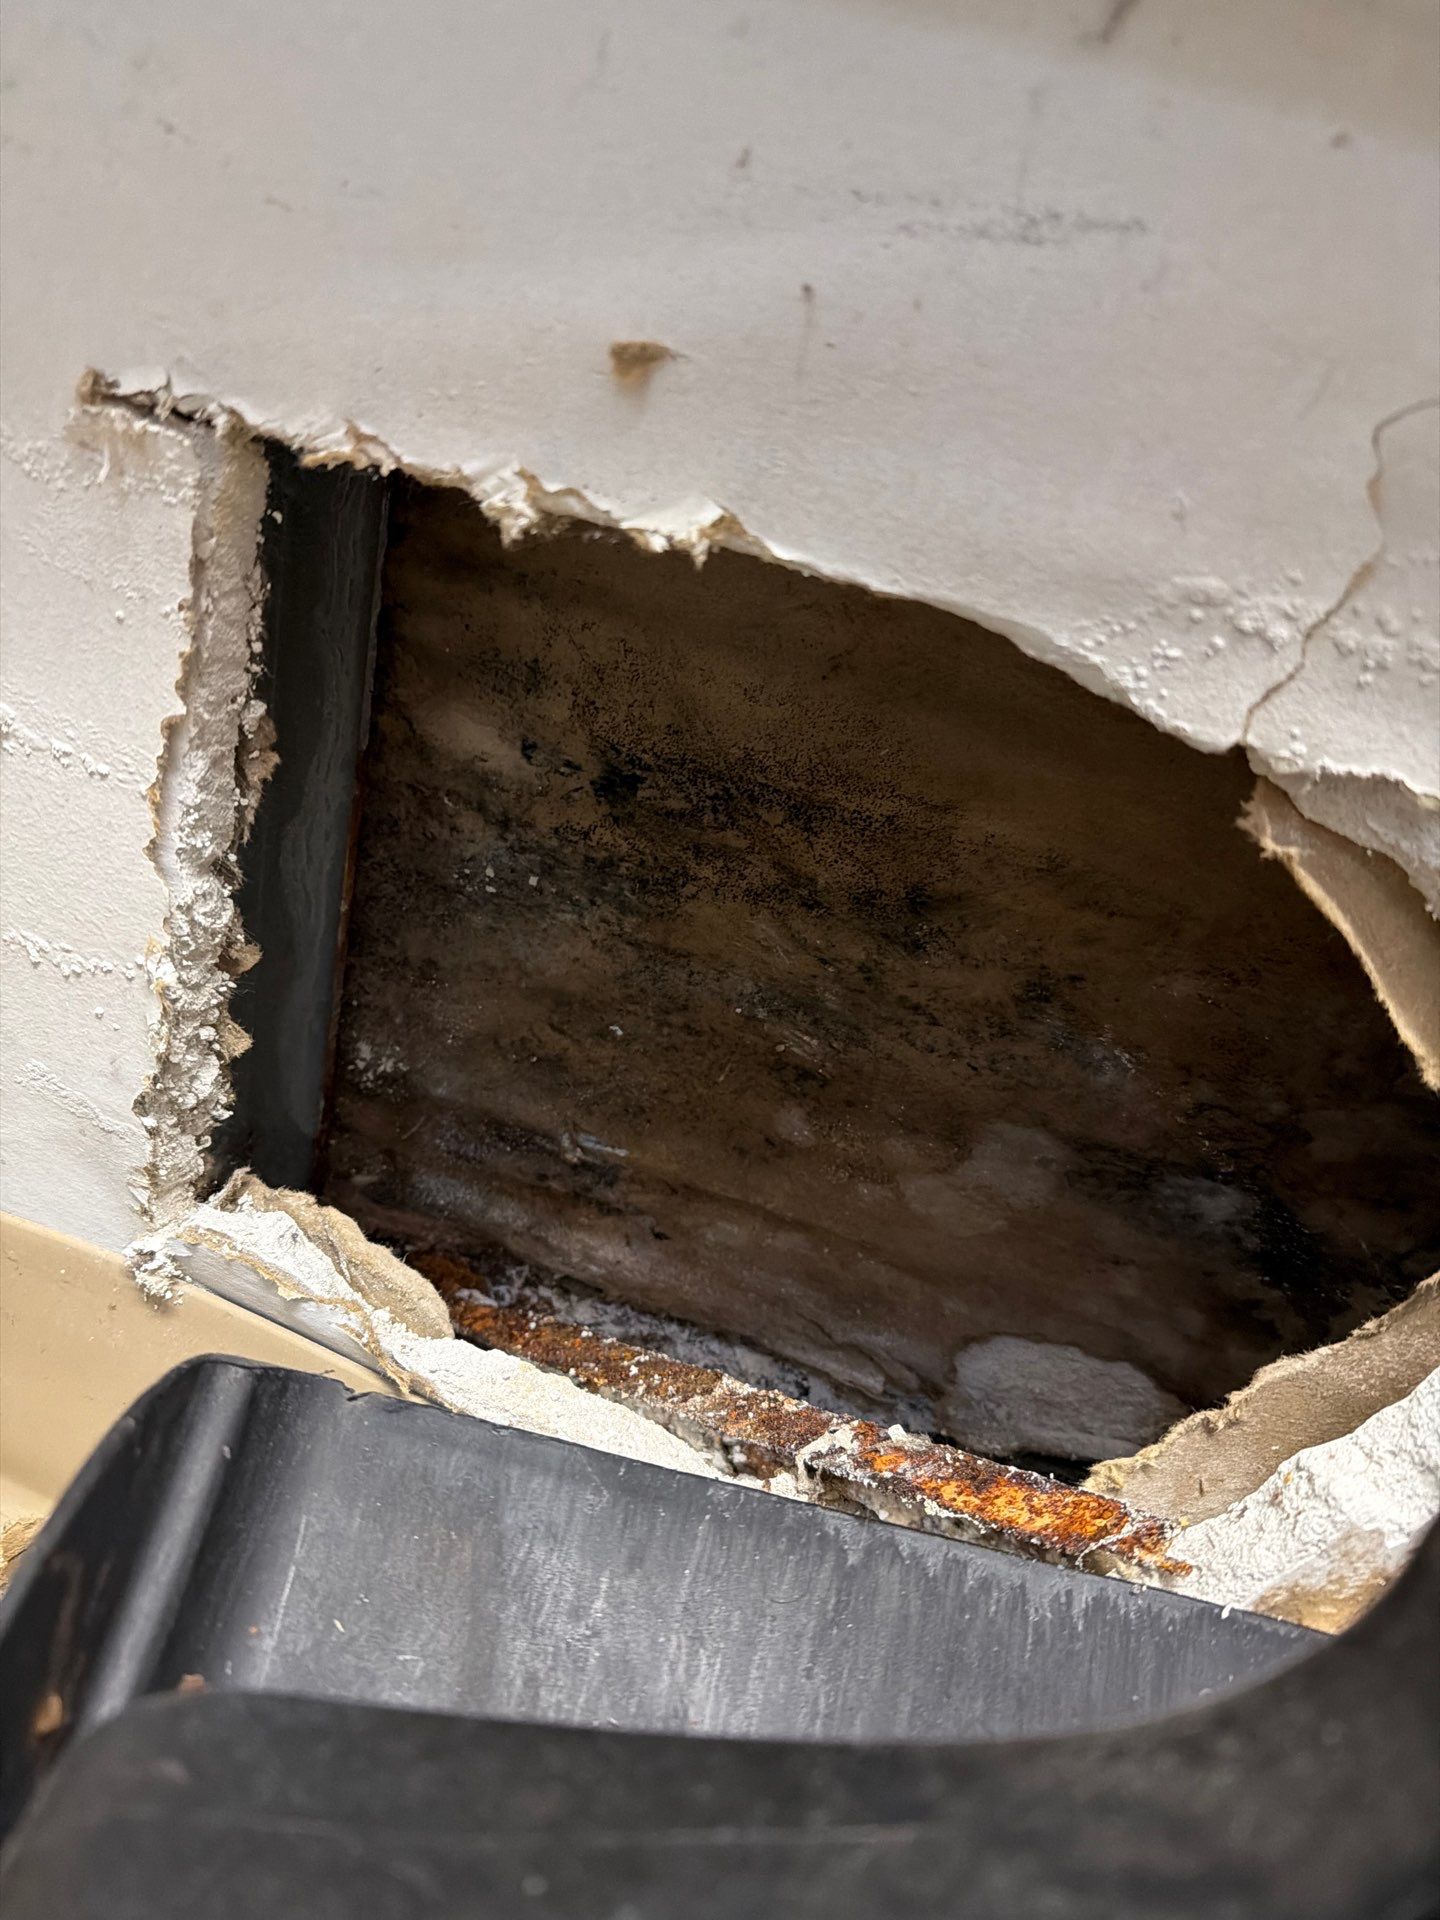
1. Confirm the Source Before You Move the Fridge
Before you yank the appliance out and rip the floor open, identify exactly where the water is coming from. Refrigerator leaks fall into a short list of failure points.
- Plastic push-to-connect supply line cracked at the fitting
- Copper saddle valve corroded at the cold water pipe
- Ice maker inlet valve leaking at the solenoid
- Defrost drain pan cracked or overflowing
- Door dispenser line frozen and split inside the freezer wall
- Filter housing seal failed after a cartridge change
Shut off the water at the saddle valve or the shutoff under the sink. Then pull the fridge forward six inches and look at the floor, the baseboard, and the wall.
Quick clues that point to each failure type:
- Puddle directly under the rear right corner usually means the inlet valve or supply line
- Water trickling down the back wall points to the saddle valve or compression fitting
- Ice buildup in the freezer floor signals a clogged defrost drain
- Wet front kick plate after dispenser use indicates a split internal line
- Drip from the filter housing after a cartridge swap means a missing or pinched O-ring
2. Map the Hidden Damage Path
Water from a fridge line rarely stays under the fridge. It travels along the subfloor, down through floor joists, and into whatever room sits below. In a Albany two-story, that usually means a stained dining room ceiling. In a ranch, it means a soaked basement ceiling tile or moldy joists.
Common damage zones we inspect:
- Subfloor under the refrigerator footprint (24 by 36 inches typical)
- Adjacent cabinet bases and toe kicks
- Hardwood or laminate planks two to eight feet from the fridge
- Drywall on the back wall behind the fridge
- Basement ceiling joists directly below
- Insulation in the joist bay (soaked and compressed)
Secondary damage zones that homeowners often miss:
- The plywood backing of the cabinet next to the fridge, which wicks water vertically
- Electrical outlet boxes on the shared wall, where moisture can pool inside the box
- HVAC ducting in the floor cavity, which spreads humidity into other rooms
- The crawl space vapor barrier directly under the kitchen
7. Dry Before You Rebuild
The single most common mistake we see in Albany kitchens is homeowners replacing flooring before the subfloor is dry. The new floor traps moisture, mold blooms, and three months later you are tearing it out again.
Proper drying sequence:
- Extract standing water and remove saturated materials
- Set air movers at a 45 degree angle along wet surfaces
- Run dehumidifiers sized to the affected square footage
- Monitor moisture content daily for three to five days
- Confirm wood subfloor below 16 percent before reinstalling flooring
Drying benchmarks we look for before signing off:
- Drywall reading under 1 percent on a pinless meter
- Ambient relative humidity below 50 percent in the work zone
- Three consecutive days of stable moisture readings, not just one
- No condensation on the underside of the cabinet bases
8. Prevent the Next Leak
Once you have been through this, you do not want a repeat. Simple upgrades cut your risk dramatically.
- Replace plastic supply lines with braided stainless steel
- Remove saddle valves and install a quarter turn ball valve
- Install a water leak detector with auto shutoff behind the fridge
- Check the line every six months when you vacuum the coils
- Replace the supply line every five to seven years regardless of condition
Smart habits that catch small leaks before they become demolition jobs:
- Place a white shop towel under the rear of the fridge and check it monthly
- Label the supply line with the install date using a permanent marker
- Add the fridge shutoff valve location to your home maintenance binder
- Have any Albany Water Restoration ice maker repair tech inspect the inlet valve while they are on site
If you suspect the leak also affected your subfloor across a larger area, our subfloor water damage detection and repair guide explains how we assess structural drying versus replacement.
6. File the Insurance Claim Correctly
Sudden and accidental discharge from a household appliance is a covered peril on almost every homeowner policy. Long-term seepage is usually excluded. The line between the two is how you document the loss.
What to do in the first hour:
- Photograph the leak source, the wet floor, and every damaged surface
- Save the cracked fitting, hose, or valve as physical evidence
- Note the date you first saw moisture, not when damage started
- Call your insurer and open a claim before demolition
- Request a copy of your policy declarations page
What to avoid:
- Telling the adjuster you knew about it for months
- Ripping out flooring before documentation
- Throwing away the failed part
- Signing a contract with a restorer who promises to handle your deductible
Documents your adjuster will likely request:
- The Albany Water Restoration service report from your restoration company
- Moisture mapping diagrams with readings noted by location
- Daily drying logs showing equipment runtime and humidity levels
- An itemized scope of repair with line item pricing
- Receipts for the failed component and any emergency plumbing work
5. Know What the Repair Actually Costs
In Albany, we see refrigerator leak restoration projects fall into three tiers based on how long the leak ran undetected.
- Minor (caught within a week): 800 to 1,800 dollars. Extraction, drying, minor flooring repair.
- Moderate (one to three months): 2,500 to 6,500 dollars. Subfloor section replacement, cabinet repair, drywall patching, antimicrobial.
- Severe (six months or more): 7,000 to 18,000 dollars. Full kitchen flooring replacement, cabinet replacement, ceiling repair in the room below, mold remediation.
For a deeper breakdown of pricing variables, our water damage restoration cost guide walks through every line item we put on an estimate.
3. Use the Right Detection Tools
Eyes and a flashlight will not find a three-month-old leak. We bring tools that read moisture through finished surfaces so we do not cut holes guessing.
- Pinless moisture meters that read 0.75 inches into wood and drywall
- Pin meters for confirming subfloor saturation
- Infrared cameras to map cold wet zones along the floor
- Hygrometers to measure ambient humidity
- Borescopes for inspecting cabinet interiors and wall cavities
If you want to understand how this works in other hidden leak scenarios, our guide on water damage behind walls and hidden leak detection covers the same diagnostic approach.
4. Understand the IICRC Water Category
Refrigerator water line leaks are almost always Category 1, clean water. That is good news. It means the water is sanitary at the source. The bad news is that Category 1 turns into Category 2 after 48 hours of sitting in flooring, and Category 3 after extended exposure with bacterial growth.
What that timeline means for you:
- 0 to 24 hours: Drying may save the flooring
- 24 to 72 hours: Subfloor likely needs replacement, mold risk rising
- 72 plus hours: Full demolition of affected materials, antimicrobial treatment, mold remediation
Signs the leak has crossed into Category 2 or 3:
- Musty or sour odor when you open the lower cabinets
- Dark staining on the bottom of the toe kick or baseboard
- Soft or spongy feel underfoot near the appliance
- Visible black or green spotting on drywall behind the fridge
- Warped laminate seams or cupped hardwood planks